Where do I find System Settings?
Press Win+I to open Windows Settings and you will right away land on the Windows 11 System settings page. System Settings let you change Display, Sound, Notifications, Power, Storage, Multitasking, Activation, Troubleshoot, Recovery, etc, settings.
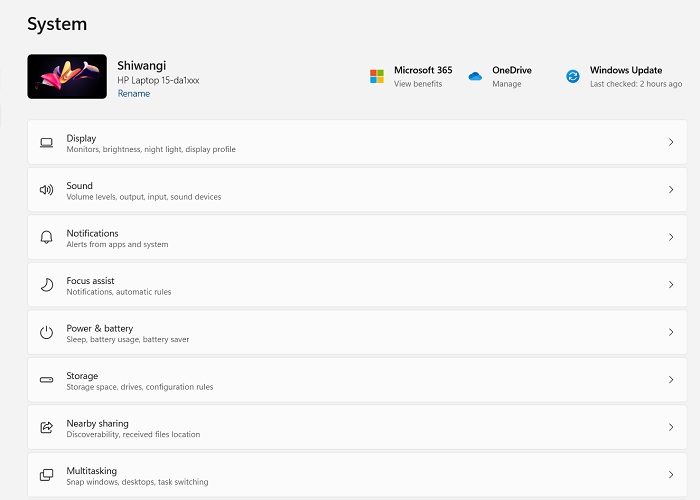
System Settings in Windows 11
To open System Settings in Windows 11, press Win+I on your keyboard and the first thing you will see on your screen will be the System Settings. This section of your PC Settings, lets you adjust – Let’s learn about each of these settings in detail.
1] Display
Here you can adjust the display settings of your PC, reduce or increase the brightness, use your PC in the Night Mode with warmer colors and also adjust the HDR settings. To use the Night Light on your PC, you simply need to turn the button On.
For those who don’t know, HDR means the high dynamic range, which further means vibrant and brighter colored pictures and videos. This feature is specifically useful for gamers or people who are into videos etc. But, not every Windows 11 PC supports HDR, thus, before you proceed with the HDR settings, you first need to check if your Windows 11 supports HDR or not.
2] Sound
Next comes the Sound settings. Obviously here you can adjust the sound input and output settings for your PC. You can select your audio output device, pair a new device and adjust the volume settings here. There are also settings for the input devices wherein you can choose the device for your speaking or recording. However, with the new Windows 11, you can now get onto the Sound settings directly from the system tray by clicking on the Volume icon. Do you know that your Windows 11 PC can automatically adjust the volume of different programs when you are making or receiving a call on your PC?
When you are at the Sound settings on your Windows 11 PC, simply scroll down and click on More Sound Settings. Go to the Communications tab and adjust the settings as per your own preferences.
3] Notifications
Hereunder the Notifications settings, you can choose if you want to get the notifications from your apps or senders or not. You can manually select the apps you want the notifications for.
4] Focus Assist
This tab also includes the Focus Assist settings which basically controls the time when you do and don’t get notifications.
Here you can either turn all the notifications off or select them as per your priorities. Also, you can create your own rules for the notifications. You will agree that the notifications often distract us from whatever work we are doing, so this part of the System Settings in Windows 11 is very important and can certainly affect your productivity.
5] Power and Battery
Here you can check how much power your PC is using, which apps and programs are using the maximum power etc. You have the Battery icon in your taskbar to see how much battery is left in your Windows laptop. You can either jump into your Battery settings from that icon or go via the Win+I > System Settings > Power and Battery. For better performance of your PC and its durability, it is very important to have good battery settings. You should adjust the time when your screen turns off and the device goes to sleep, to save power.
There is a Power Mode wherein you can optimize your PC based on its power usage and performance. You can set on the best power plan for you – Power efficiency, Balanced or Best performance. Then there is the Battery Saver wherein you can limit some notifications and background activity to extend the battery life.
6] Storage
Here you can check how is your storage in the PC used. How much space the applications/programs are taking, how much is occupied by the temporary files, and others. You can directly click on the options and delete the unwanted files to get some storage space emptied. For users who are too busy to check for the cache and temporary files in the PC, there is a feature like Storage Sense, which automatically deletes the cache and temporary files and clears the space. It also manages the content saved on the cloud.
Storage Sense by default runs when your disk space is low but you can run it every day, every week, or every month. Here you can also schedule to empty your recycle bin in 1 day, 14 days, 30 days, or 60 days. The next tab in the Storage Sense setting allows you to delete the files in your Downloads folder if they haven’t been opened for more than 1 day, 14 days, 30 days, or 60 days. By default, this setting is set to Never.
7] Nearby Sharing
Here you will find the settings to share the files, photos, and links with the nearby Windows devices. The Nearby Sharing setting by default is set to Off but you can change it to Everyone nearby or to your own devices only. Also, you can select the location where you want to store your received files. You can also change your device’s name here by clicking on Rename.
8] Multitasking
Multitasking, the feature is obviously here to improve your work experience and increase your productivity. The Snap windows feature lets you switch between the tabs quickly. From the Desktop tab, you can choose if you want to see the open windows in the desktop you are using or on all the desktops.
Alt+Tab when pressed together on the keyboard shows all the open tabs and windows on your PC. Here, you can choose whether you want to see the open windows only or the tabs too. Title bar window shake, enable it, and whenever you take your cursor to the address bar the window will automatically shake and minimize. Read: Windows 11 Tips and Tricks.
9] Activation
This tab shows the Activation state of your operating system. You can also upgrade your Windows edition here or change the license key.
10] Troubleshoot
Select if you want the troubleshooter to run automatically without any notification or with notification, or to ask you before running or just don’t run any. You can also check the troubleshooter history here. Click on Other troubleshooters to see all the Windows Troubleshooters available on your PC.
There is a troubleshooter for almost everything, including your Internet connection, Audio, Printer, Windows Update, Bluetooth, Camera, Incoming Connections, Keyboard, Network Adapter, Power, Program compatibility, Audio recording, Search and indexing, Shared folders, Video playback and Windows Store apps.
11] Recovery
Sometimes, the troubleshooters too can’t solve the problems, however, there are fixes available for almost every problem but if nothing is working, then maybe resetting the PC may help. This is where Recovery comes into the role. You get two Recovery Options here, the first is to Reset this PC and the other is Advanced Startup. If you choose to Reset your PC, you can choose to keep or remove your personal files and then reinstall Windows on your PC.
Advanced Startup on the other hand is a restart option for your PC wherein you can change the Startup Settings for your PC. After the Restart, you will get the option to change.
It is suggested to save all your unsaved work before you hit the Advanced Startup button to save your data.
12] Projecting this PC
You can project your Phone or PC to this device and use its keyboard and mouse etc. You can in fact add some Android devices too. Your PC can be discovered for projection only when it is plugged in. You can choose to make it available everywhere or only on secured networks, requiring a PIN to connect or not.
13] Remote Desktop
Remote Desktop basically is a feature that lets you connect to a Windows computer in another location and use its desktop. It is useful specifically for people who want to connect and control other devices over the local network or internet.
14] Clipboard
We don’t often talk about it but I think this is one of the most used features in your Windows PC. Every time you press Ctrl+C or manually copy anything on your PC, it is saved in your Clipboard. But if you again copy something else, it will replace the first thing you copied. This is where Clipboard Settings come into play. Toggle the key to ON and you can save multiple items in your Clipboard. Copy multiple items in your Clipboard and press Win+V on your keyboard to see all the copied items. Select the one you want to paste. You can also automatically sync your Clipboard items with the supported devices which is a very useful addon to this feature. So, these were the System Settings explained in detail for your Windows 11. This post will certainly help you understand your Computer System better.
Where is Settings in Windows 11?
In the exact center of the Taskbar, you will find the Start Menu. To open the Windows 11 Settings, right-click on the Start Menu, and simply click on Settings. That’s it! You will now see a window that shows you all the Windows 11 Settings. You can also click on Volume or Network icons in the Notification area. Read next: How to use Windows 11 efficiently.